What Is Macro Photography?
Tom Davis Tom's home page
Last Modified: November 14, 2000.
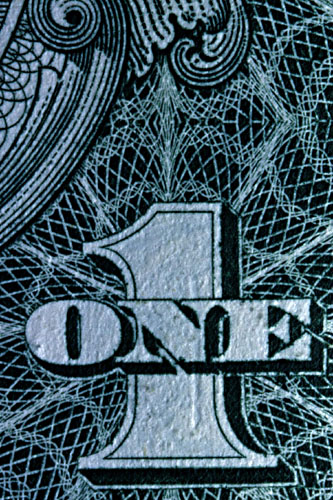
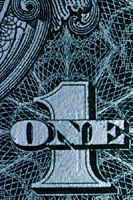 Macro photography is used to describe the art of taking photos of small
things. Many camera manufacturers sell so-called "macro lenses" that
are specially designed to do this well. Nikon, of course, wants to be
different, and calls them "micro lenses", but a Nikon "micro" is
designed with the same purposes as any other manufacturer's "macro"
lenses. Here is an overview of macro lenses.
A more complete description appears later on this page.
Macro photography is used to describe the art of taking photos of small
things. Many camera manufacturers sell so-called "macro lenses" that
are specially designed to do this well. Nikon, of course, wants to be
different, and calls them "micro lenses", but a Nikon "micro" is
designed with the same purposes as any other manufacturer's "macro"
lenses. Here is an overview of macro lenses.
A more complete description appears later on this page.
There are lots of ways to go about getting magnification with a camera,
and I'll talk about many of them here. The topics below are arranged
roughly in order of difficulty. In addition, there are two
"theoretical" sections at the beginning that I highly recommend, as the
later sections on technique will make a lot more sense if you understand
them.
How Close-up Is It?
Since, in principle, you can take any negative and blow it up as large
as you want, aside from resolution problems, there is really no limit on
how large an image you can make from any photo. But you can't change
the size of the negative, and the area on the negative (or the CCD, in
the case of a digital camera) that your subject
covers determines how good a print you can make.
Thus, the best way to determine how good a close-up you've taken is to
measure the actual object you've taken a photo of, and measure how big
that object is on the negative or slide. If they are exactly the same
size, we say that the magnification is 1:1 (read this as "one to one").
In other words, the image on the negative is exactly as big as the
object itself was.
For 35mm film, this means that an object that's 36mm long (about an inch
and a half) would completely fill a negative or slide in the widest
direction.
If you don't do quite that well, and your image on the slide is only
half as big as the original object, the magnification is 1:2. If you do
exceptionally well, and the image on the slide is twice as big as the
original object, you got 2:1 magnification. 1:1 magnification (also
called "life-sized") is pretty good. Anything with magnification of about 1:2
or more is often called macro photography.
Tom's Optics "Theorem"
In freshman physics, there's usually a section on optics, and you spend
a few painful weeks learning all sorts of equations that tell you how
lenses behave. Since I'm sure that almost nobody is interested in a
rehash of their college physics course, I'm going to boil it down to
just a few key ideas that don't involve any equations. Obviously if you
want to work out exact distances or exact focal lengths, you'll need the
equations, but I've been taking photos for many, many years, and I've
never needed any exact values.
Tom's "Fundamental Theorem of Optics for Photography" is this: If
you stack up any combination of lenses with any distances between them,
as long as they're lined up center to center, the whole combination will
behave exactly like a single lens.
So if you take a lens and mount it further from the camera, or if you
reverse it somehow, or if you take two lenses and put one in front of
the other, or whatever, the resulting combination will behave like a
single lens.
This is exactly true in the so-called "thin lens approximation", which
applies to "infinitely thin" lenses. Your lenses are not. So that
means that there will be some distortion, depending on what you do, and
so the more lenses you stack up, or the further they are from their
optimal design configurations, the more distortion you're going to get.
But go ahead and stack them any way you like -- with an SLR you can look
through the viewfinder and see if you can even focus the mess, and you
can often see the sorts of distortion you're likely to get. For
combinations that seem to work well, take a few sample photos and see
what the quality is like.
In addition to my "theorem" above, the other main idea to
understand about optics is this. A lens will only focus
perfectly on your film for objects in one plane parallel to the
plane of the lens. The further the lens is from the film, the
closer that plane of perfect focus will be the front of the
lens.
In other words, what normally happens when you focus a lens is that you
move the lens toward or away from the film. The further the lens is
from the film, the closer objects will have to be to the lens to be in
perfect focus, and vice-versa. (Note: there are some so-called
"internal-focus" lenses where it's not at all obvious what's happening
as you turn the focus ring -- the lens appears not to change size or
shape at all, and what's happening is that the little lens elements
inside the lens are being moved around relative to each other to change
the effective distance of the lens from the film.)
But if you take any lens and don't change the focus setting on
it, and mount in front of an extension tube, the result will
focus closer because the optical center of the lens has been
moved away from the film by the length of the extension.
Depth of Field
When you focus a camera, it is only in focus exactly at one
distance from the lens. At any point closer or further away, it
will not be in perfect focus; it will just be in pretty
good focus. And the further you are away from that point of
perfect focus, the more blurred your image will be.
One nice way to think about it is this. Imagine a point in space
that you would like to focus on. This is just a single very tiny
point. Light from the sun (or your flash) scatters from this
point in all directions, leaving, and that light hits your
camera's lens. The lens intercepts a circular chunk of the light
and bends it back into a cone whose base is at the lens. If the
exact tip of that cone is on your film, then all of the light from
the tiny object will be focused on that one point on the film, so
the object will be in perfect focus.
But now imagine that it isn't quite in focus; in other words, the
film is slightly too close or slightly too far from the lens.
Then the incoming light will smear to a small circle which is the
size of the tip of the cone that the film cuts through. Although
all the light from the subject comes from a point, it will be
smeared to a small circle on the film. This is the blur of a
blurred (out of focus) image.
The more error there is in film position, the larger will be the
circle (the blur). You can change the focus by twisting the
focus ring on the lens (or your camera will do this for you if
it's an auto-focus camera), and what this effectively does is
move the lens closer to or further from the film.
Unfortunately, objects at different places in space will focus at
different distances from the lens, so wherever you put the film,
some of your subjects will be too close, and some too far away
(unless, of course you are taking photos of perfectly flat
objects).
So all you can do is to pick one object that you want in focus,
you can then focus on that, and everything closer and further
away will be out of focus.
Now obviously, if you're very close to being in focus, the error
will not be too bad, and since you're just a human, your eyesight
isn't perfect anyway, so there will be a small range around the
point of perfect focus where the error is so small that the image
is "good enough". This distance is called the "depth of field".
So maybe if the object at perfect focus is 8 feet from the lens,
everything from 7 feet 6 inches to 9 feet from the lens is in
"good enough" focus. In this case, the depth of field is 1.5
feet.
Unfortunately, as things get close to the lens (even with the best
possible lenses), the depth of field gets smaller and smaller.
This is the main problem faced by macro photographers. Their
depth of field may be only a half of a millimeter.
So what can you do? The easiest thing is to reduce your
aperture. This means that you effectively make the circle of
light cut out by your lens smaller, so the cone is much
skinnier. With a skinnier cone, an error forward and back makes
a smaller error circle (this is usually called the "circle of
confusion"). So the smaller the aperture (in other words, the
larger the f/number), the more depth of field you will get.
But if the aperture is smaller, less light gets in and you need
longer exposes. You just can't win!
But you can do things. For example, if your subject isn't
moving, put your camera on a tripod and take a long exposure. If
it is moving, use a huge flash so that even with a tiny aperture
enough light gets in for a proper exposure. Or better, use a
combination --- a tripod plus a flash.
When you shoot macro, it's not unusual to shoot at f/22, f/32, or
even f/45. There are, however, physical limits caused by
diffraction. When light travels through a small enough hole,
there are edge effects that also scatter the light. Once the
opening is effectively f/45 or so (and the exact number depends
on the focal length), the tiny aperture itself causes blurring
due to light diffraction.
On most lenses, you can read off the depth of field which will be
a function of how close to the lens you are focused, and on your
aperture. Some cameras also have a "depth of field preview"
button that you can press to see exactly what will be in focus
when you shoot the shot. (Normally, while you are composing, et
cetera, the lens is wide-open to let in as much light as
possible. Then, when you trip the shutter, the lens closes down
to your selected aperture, the shutter opens, and the film is
exposed.)
Macro Lenses
Many camera companies produce so-called "Macro Lenses". (Nikon
calls them "Micro Lenses", but they are exactly the same thing.)
Such lenses are designed to work optimally under macro conditions.
My theorem above ignores all the ugliness of real lenses, and
assumes that every lens is a perfect thin lens. In the real
world, there are many distortions that may get very bad if the
lens is used far outside the range where it was designed.
Macro lenses are designed to work in close-up situations. The price you
pay usually has two forms. One is the actual price of the lens -- macro
lenses can be quite a bit more expensive. The other price is that macro
lenses typically have a smaller maximum aperture than you can get with a
standard lens. For example, Nikon's 60mm macro lens is only f/2.8.
It's not hard to get a f/1.4 55mm standard lens, which will let in four
times as much light when it's wide-open. Actually, there's also a third
price you pay: macro lenses are often physically bigger and heavier.
In spite of the disadvantages above, I often put on my 60mm f/2.8 macro
as a standard lens when I'm just taking a camera along with no
particular purpose in mind. It is a bit heavier, and I may have trouble
in dim light, but if I see a really interesting little insect or flower,
I'm in business.
One thing to beware of is that many (not all) of the zoom lenses are
advertised as working in the macro range, and this usually means that
they can work a little outside the normal range for such lenses, but
they don't work anywhere near as well as a macro lens designed
specifically for that purpose. On the lens barrel of such lenses,
there's often a colored stripe at the close-focus end, marked "Macro".
Before buying one of these and thinking that you've got a real macro
lens, compare it to a standard, fixed-focal length macro lens. (Hint:
a real macro lens will not have "Macro" printed on a portion of the
focus ring.)
There are other things that a macro lens may be optimized for. One type
of lens is called "flat field", and this means that it is in focus on a
planar area. If you want to take pictures of flat things, like pages of
a book, or other photos, or coins, or paintings, you'll want a flat
field lens. Other lenses are exactly in focus on a curved surface in
space. Since the vast majority of photographic subjects aren't flat, it
doesn't matter much whether most lenses are flat-field -- you'll just
look through the viewfinder and make the best possible tradeoff. But if
you're shooting a printed page, it's a real bummer to have the words in
the center readable while those at the edges are not.
Using Flash
When you use a macro lens, especially at high magnification, one of the
main problems you will have is getting enough light. Whatever you do to
increase the magnification will tend to reduce the amount of incoming
light. This makes sense, since you're taking a photo of a smaller and
smaller part of the world, and the total amount of light it reflects is
constant, so less and less of that light reaches the film.
It's a bit tricky to calculate exposures, especially for
highly-magnified scenes, and in the old days I simply bracketed all my
shots. ("Bracketing" means that you make a guess as to the correct
exposure, and then under- and over-expose around your guess. For
example, if you think the shot should take 1/8 second at f/16, you
simply shoot at 1/4, 1/8, and 1/16 seconds. Or if you're even more
paranoid, at 1/2, 1/4, 1/8, 1/16, and 1/32 seconds. This example is
bracketing by full stops -- you can bracket at 1/2 stops or even 1/3
stops on some cameras. You can also bracket the f-stop setting if you
want to preserve the shutter speed.)
But now, thanks to the wonder of TTL metering, macro exposure is much
easier if you've got an electronic flash. "TTL" stands for "Through the
lens", and here's how it works. When you press the shutter release and
the shutter is fully open, the flash goes off. Light travels from the
flash to the subject, and some of that is reflected back to the film.
The camera has a detector inside it that measures the amount of light
arriving at the film, and the moment that enough light has arrived for a
proper exposure, the flash is "quenched" (turned off).
Now there are obviously a couple of possible problems with this scheme.
First of all, what if the flash uses all of its energy and there's still
not enough light for a proper exposure? Well, in that case, you're out
of luck and you'll get an under-exposed photo.
Second, what if the shutter is open for a long time, and it's really
bright out? As an example, imagine that you're shooting at 1/8 of a
second. The flash will quench after, say, 1/1000 of a second, but
the shutter will remain open for the remainder of the 1/8 of a second,
and you'll almost certainly over-expose.
Here's how I get pretty good macro shots almost every time. You've got
to be willing to waste a little film, but with a little practice, you
can reduce this to almost nothing.
Set your camera in full manual mode. Then set the shutter speed to the
highest speed that's possible for "flash-sync". Often this speed will
be marked in a different color on your shutter-speed adjustment, but if
not, look it up in your owner's manual. On high-quality cameras, it
will probably be 1/250 second. On lower-quality modern cameras, it may
be 1/125 second. On old cameras, it may be as low as 1/60 second.
Next, given your subject, make a guess at how small an aperture you can
get away with. If you're close to the subject, this may be as small as
f/32, but it may be larger. Set the aperture to this best guess.
Now take a shot with the flash in TTL mode (see your owner's
guide to figure out how to do this. For most modern flashes,
it's the default.) If there's not enough power to get a proper
exposure, most flashes will so indicate by a flashing indicator
light or something. If this happens, it means that you guessed
wrong about the minimum aperture -- open up a bit and shoot
again. If the light doesn't blink, then maybe you should try an
even smaller aperture. Stop it down a notch and try again.
Here's the theory. You want the fastest shutter speed so that ambient
light doesn't have any effect on the shot -- or at least has as small an
effect as possible. You want as small an aperture as you can that still
allows in enough light for a complete exposure because that will give
you more depth of field, and depth of field is going to be your largest
problem for macro shots. By diddling the aperture until you're shooting
so that the flash can just barely make it, you'll get the most depth of
field. Since the entire flash takes probably less than 1/1000 second,
with a tiny aperture you're effectively shooting at 1/1000 second.
Things can be made much better using a flash extension cord. Normally,
the flash is mounted directly on the camera body, and although this is
great for shots of people, if you're trying to shoot something that's
1/2 inch from the lens, the vast majority of the light from the flash
will go over the top of your subject. A flash extension cord lets you
move the flash anywhere you want (within a couple of feet, at least).
You can hold the flash right next to the lens. Try shots with the flash
close, but off to the side, or various other things. If you've got a
friend, have him/her hold the flash while you manage the camera. Some
systems allow you to synchronize multiple flashes, so you can eliminate
shadows (and have a lot more light).
In the old days (and of course with older systems), you have to do a
calculation of the amount of light arriving at your subject based on the
power of the flash and the distance to the subject. This calculation,
of course, relied on having the flash pointed directly at the subject.
If the flash is coming in at an angle, or is bounced off a reflector
first, or is being scattered by some sort of light "softening" plastic
the calculation had to be adjusted in some way that was often impossible
to compute. So when this was the situation, you'd either bracket your
shots, or run a test flash with an incident light meter at the subject.
But with TTL, this is all unnecessary -- the flashes continue to put out
light until exactly enough has arrived for a proper exposure, then they
magically turn off.
TTL, of course, works also in non-macro photography, but it is
especially useful for close-ups.
Macro Flash
Some manufacturers produce special macro "flash rings" especially for
macro photography. They hook to the end of the lens, so they're
automatically right out there near your subject. Typically, they have
two flash tubes, one on either side of the lens. You can rotate the
tubes so that they're vertical or horizontal. You can even choose to
use one or the other or both for various shadowing effects.
These macro flashes are more expensive and less powerful than a standard
flash, but for some macro work, they're just the thing.
In most modern TTL systems, you can use multiple flashes
together, as long as you have the appropriate cables, so that
when you trip the shutter, all the flashes go off, and when the
correct amount of light reaches the film, all of them are
automatically turned off at the same time. There are even
devices that you can buy that sense the light of flashes and
instruct the flash connected to them to go while the others are
flashing, so you can have remote TTL light sources. This isn't
quite so important for macro, but they can be used. The ring
flashes can be used in combination with additional flashes (at
least on the Nikon system) to extend the amount of flash
available in TTL mode.
Extension Tubes
If you watch most lenses, as you focus on objects that are closer to the
camera, the main lens moves further from the film. (With some so-called
"internal-focus" lenses you can't see this, but with most standard
lenses it's pretty obvious.)
But at some point, you can't turn the focus knob any more, and
however far from the film the lens is at that point is as far as
it's going to get so at that point you're focusing as close as
you ever will -- unless, of course, you use extension.
The simplest way to get extension is simply to attach a hollow tube
between the camera body and the lens. These exist, and are called
"extension tubes". They have mounting hardware on one end that will
attach to the camera body and on the other end to hook to your lens.
Some of them have linkages or even electronics to transmit information
from the lens back to the camera body, depending on the sophistication
of the system. But basically what they do is to let you move the lens
further from the film and hence, focus on objects closer to the lens.
Often, you can get tubes in different lengths, and you can hook a series
of them together to get more and more extension. The longer the tube or
total length of the tubes hooked together, the more magnification you
will get.
Of course this all doesn't come for free. There is a list of things to
consider.
First, most lenses are designed to be optically optimum in a
certain range, and the lens manufacturers let you use this entire
range using the normal focusing ring. When you put on an
extension tube, you are effectively pushing the lens outside its
optimal range. The more you push it, the more distortion (of
various sorts) you'll get. Note that lenses that are
specifically designed as macro lenses are already optimized for
close up work, so you'll usually have less troubles using them on
the ends of extension tubes or bellows (see below for information
on bellows).
Second, as soon as you slap in an extension tube, you lose focus
at infinity since you can't bring the lens all the way back.
Imagine how terrible you'll feel if you've got some extension on
your telephoto because you're shooting a close-up of a
hummingbird and then you suddenly notice an Ivory-billed
woodpecker 30 meters away. You swing your lens around to get
that once-in-a-lifetime shot and find that you can't focus
because the bird is too far away. Then, as you desperately are
taking the lens off to remove the extension, the bird flies away.
Third, the more extension you use, the harder it gets to focus for two
reasons. First, far less light is coming in, and second, with a lot of
magnification, the depth of field gets extremely tiny.
Finally, many camera systems lose a lot of their automatic features
(such as auto-focus) when you're using extension. You'll have to know
how to use what will basically become a manual camera. This does not,
however, apply to TTL metering. TTL miraculously takes it all into
account.
But even with all the disadvantages listed above, I still think that
extension tubes are the best way to go, especially for a beginner at
macro photography. First of all, there's no additional glass between
the film and the subject -- just a tube full of air. Because of this,
they're also relatively cheap, at least compared to some to the options
presented below. They can also be used in conjunction with the methods
below as well to increase magnification. So in my opinion, if you're
interested in messing around with some close-up photography, the best
thing you can do is to get one or two extension tubes of different
sizes.
Extension Bellows
A bellows is basically just an extension tube of variable length,
but usually that length can be very long. Extension tubes may be
30 or even 40 millimeters long, but a bellows may be a couple of
hundred millimeters long. They are used for extreme close-ups,
so all the problems you had with extension tubes you will have in
spades with bellows.
Before you start messing with bellows, make sure you've got a heavy,
solid tripod to hold everything still, and be ready to spend a lot of
time working on each shot, and be prepared to take a lot of really
terrible shots.
When you hook a lens to your camera through a good set of extension tubes,
the various mechanical and electrical linkages between the lens and the
camera body are preserved. (With cheap extension tubes, this may not be
the case.) With extension bellows, you're almost certainly going to lose
these features.
Here are a couple of the things you lose:
Normally, even when you set your aperture to a small opening to
improve depth-of-field or for whatever reason, the diaphragm
doesn't close down until you trip the shutter. A mechanical
linkage holds the lens wide-open so that a lot more light gets to
the viewfinder and/or the auto-focus system. With the lens
stopped down, and not much light coming through, it's tough to
focus manually, and it's often impossible for an auto-focus system
to operate at all. So if you're using bellows, you have to
manually open the lens up to do your focusing, and then manually
stop it down before you take the shot. This is another reason
that a very solid tripod is necessary -- you don't want anything
to move after you've got your subject in focus and you're messing
with the aperture to get better depth of field.
Similarly, if the electrical connection between the lens and the camera
is broken by the extension bellows, the camera doesn't have any idea what
sort of lens is sitting on the other end, so full program-mode automatic
operation is impossible. About the only thing that'll work (other than
a pure manual mode) is aperture-priority mode.
You can purchase a device to help with one of these problems --
it's a cable-release that has two connections on it. As you
press the button to trip the shutter, first one of the cables
that's connected to the lens pushes the little lever on the lens
to close down the aperture, and as soon as that job is done, the
second cable causes the camera's shutter to trip. This device
can also be useful for reversed lenses; see that section below.
Close-up "Filters"
I put the word "filters" in quotations because they really aren't
filters in the normal sense. They are simply additional lenses that can
be screwed onto the front of whatever lens you are already using to
increase the magnification.
The magnification power of these "filter" lenses is measured in "diopters"
which is basically 1/f, where f is the focal length in meters. The advantage
of using the diopter measure is that the more diopters, the more magnification
you're going to get. Also, you can get a rough idea of the amount of
magnification you're going to get when you "stack" together more than one
of these lenses (sometimes called "diopter lenses" is to add the diopters
of the lenses. In other words, if you stack a 1 and a 2 diopter filter
in front of your lens, it's roughly the same as putting on a single 3 diopter
filter.
The disadvantage, of course, is that there's more glass between your subject
and your film, and if the diopter lenses are of low quality they can cause
all the usual problems -- non-linear distortions, loss of light because the
coatings aren't perfect, more random photons bouncing around at oddball
angles inside your camera because of reflections off the surfaces, et cetera.
Although to a beginner, these filters seem like the easiest way to get
higher magnification, I think they're more trouble than they're worth, and I'd
vote for simple extension tubes instead. But if you do insist on using them,
buy filters whose quality is at least comparable with the quality of the
lenses you're planning to use them with.
Reversing Lenses
In a perfect world where the thin-lens approximation was exactly true, there
would never be a reason to reverse a lens, but because you're working in the
real world, you can often get better magnification by turning your lens around.
Just what does it mean to turn a lens around? It simply means that the end
of the lens that normally connects to the camera is nearest the subject, and
the front of the lens is attached to the camera. To do this, you need a
special device that attaches to your camera body like a normal lens mount,
and on the other end has a set of threads that screws into the lens the way
a filter would normally attach.
The reason this sometimes works to improve magnification is that the optical
center of the lens is not necessarily in the physical center. By reversing
the lens, you may be (and in fact, usually are) moving the optical center
further from the film. As you recall, the standard lens formula tells you
that this causes the focus to move closer to the camera, thus increasing
the magnification.
Of course with a reversed lens, you have the same problems you did with a bellows --
you've lost the normal mechanical and electrical connections between the lens and the
camera body. Read the section above on extension bellows to learn what the
problems are, and how you can solve them.
Tele-Extenders
There's not much to say here, except to note that the addition of a tele-extender
to a combination of lenses is another perfectly reasonable way to modify the
magnification. There's the usual disadvantage that there will be a bunch of
extra chunks of glass (in the tele-extender) between your subject and the film,
but it may give you more magnification.
Combinations
Finally, note that combinations of the techniques above may be
used -- you can reverse a lens on the end of an extension
bellows, with a diopter lens screwed on for good measure.
There's nothing to prevent you from trying out almost any
combination you like, except that the more stuff you add on, the
more likely it is that you'll get unacceptable aberrations. So
if you're thinking of using some exotic combination to get really
close-up shots of those weird bugs in Africa, try out the
combination at home first on a test roll to see how it works.
Don't come home from Africa with 50 rolls of garbage.
Return to the beginner's guide.
Want to send me mail? Click: (
tomrdavis@earthlink.net)
 Macro photography is used to describe the art of taking photos of small
things. Many camera manufacturers sell so-called "macro lenses" that
are specially designed to do this well. Nikon, of course, wants to be
different, and calls them "micro lenses", but a Nikon "micro" is
designed with the same purposes as any other manufacturer's "macro"
lenses. Here is an overview of macro lenses.
A more complete description appears later on this page.
Macro photography is used to describe the art of taking photos of small
things. Many camera manufacturers sell so-called "macro lenses" that
are specially designed to do this well. Nikon, of course, wants to be
different, and calls them "micro lenses", but a Nikon "micro" is
designed with the same purposes as any other manufacturer's "macro"
lenses. Here is an overview of macro lenses.
A more complete description appears later on this page.