Photo Advice for Botswana
Tom Davis
Last updated: October 22, 2012
Visit my Home Page.
Want to send me mail? Click here: tomrdavis@earthlink.net.
Return to my main Botswana photo page.
Safari Photography Advice
Here's another page of good safari photography advice by Nathan Myhrvold. I based a lot of my decisions about what to take to Africa on the material on this page.
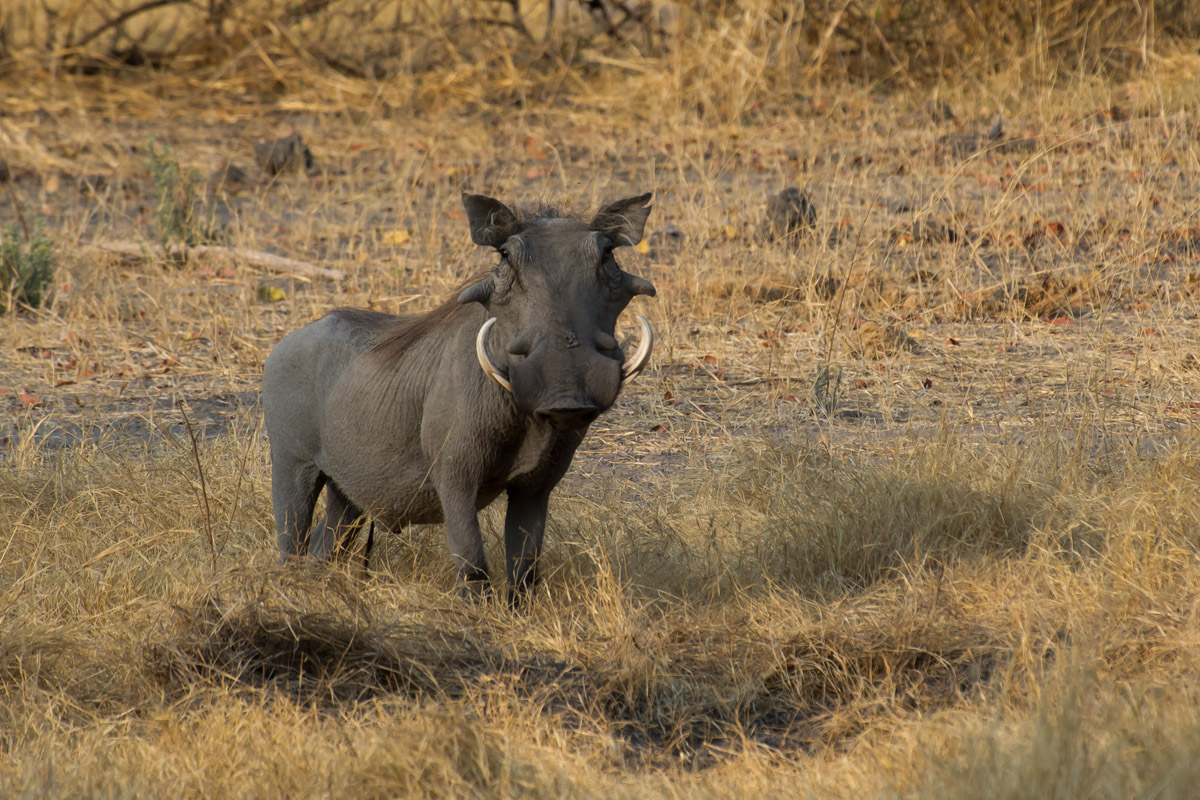
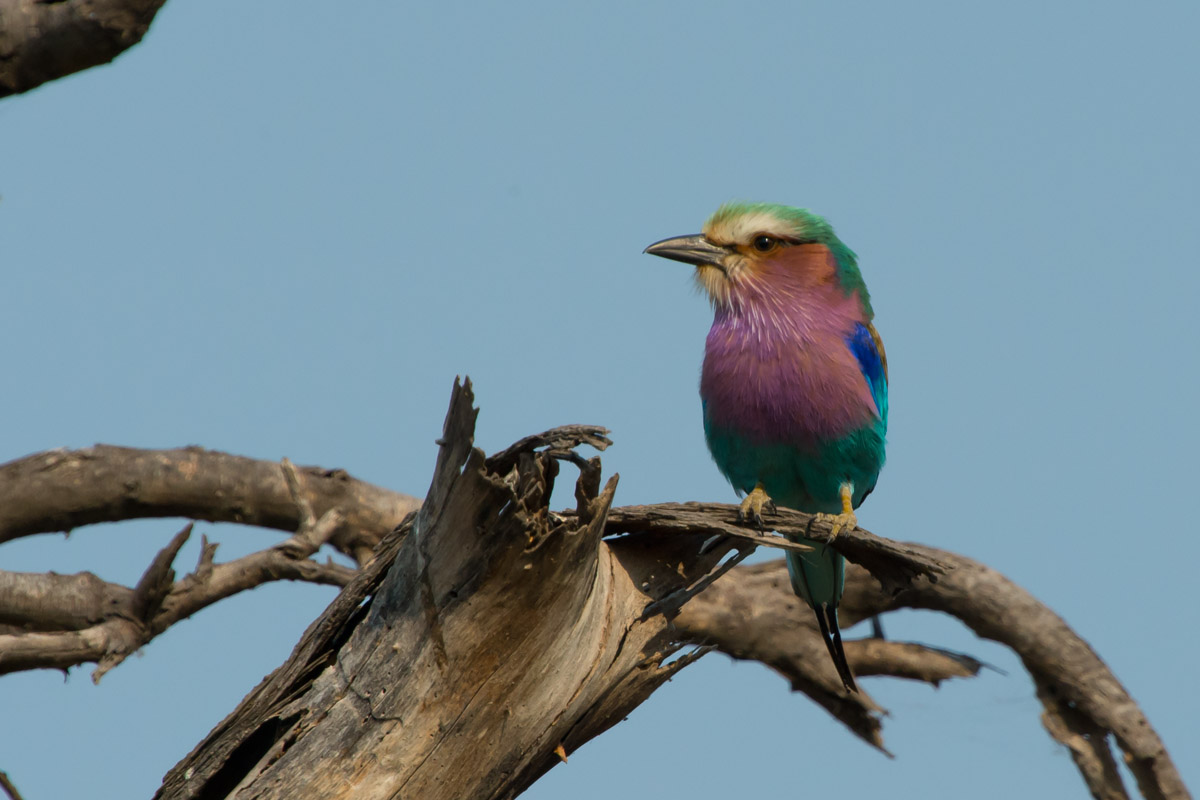
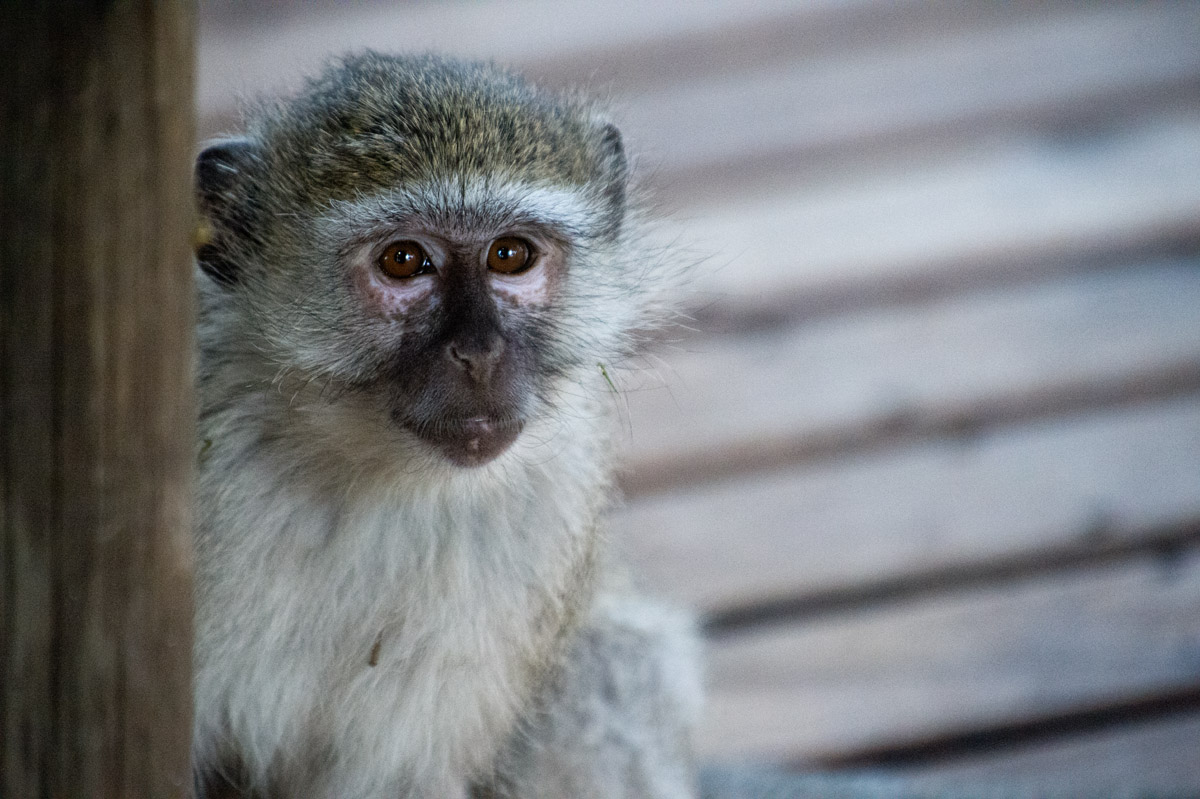
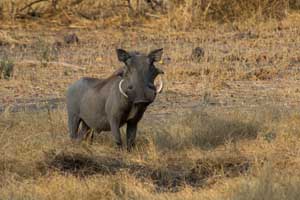
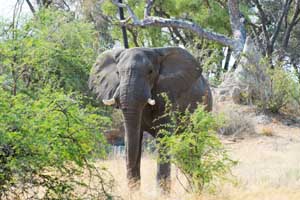
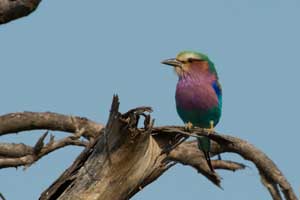
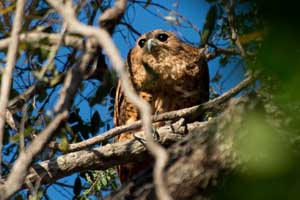
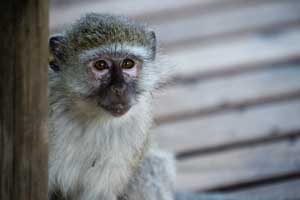
You can click on any of the animal images below to obtain larger versions. Or just go to the main Botswana photo page to see all my animal images, including labels.
 My wife and I spent two weeks in Botswana in September and October 2012, looking for and photographing animals (mostly birds). I was the photographer; she was the looker. Where possible, we paid a bit extra to have private vehicles so we could do exactly what we wanted in terms of spending time to get exactly the right photos, the right lighting, et cetera. We're also more interested in birds than the typical safari goer, and with a private vehicle we wouldn't annoy the other passengers when were chasing and trying to photograph even the "little brown birds."
We're both interested in almost all animals, so we weren't just looking for the impressive animals. We're particularly interested in birds, but also reptiles, insects or anything else we can find.
I spent a lot of time researching the conditions in Botswana and was quite happy with the equipment I took. I can't think of anything I missed having and the only piece of equipment I took but hardly ever used was a heavy-duty flash (the Nikon SB-910) for my camera.
At the end of this document is a fairly complete list of the equipment I took.
Since I was a graduate student I've always used Nikon equipment, but I'm sure there is an almost-equivalent version of every item in the Canon product line. The "VR" on the Nikon lenses stands for "vibration reduction" and on Canon lenses, the equivalent specification is "IS" (image-stabilized).
 The D4 uses compact flash or Sony XQD cards. The D800 uses compact flash or SD cards. I had some (low speed) SD cards for an older video camera, so I crammed one of those into the D800 slot for recording video only, but relied on the high-speed (1000x) compact flash cards that I could use in both cameras. I took a lot of memory: 192 gigabytes in high-speed CF cards (2x32 + 8x16). I would have used 6 of the 32 gb cards, but they weren't available in time to purchase them for the trip. I used almost all of the cards over 11 full days of shooting.
Unfortunately, the new CF cards arrived just a day or two before we took off, so I didn't bother to test them, and one of them failed in the camera in the worst way: it apparently worked, but when I tried to view the results on a computer, about half the files written on it were corrupted. I swapped the card to the other camera body with the same result, so it was the card that was bad; not the camera (thank goodness!)
Nikon may have made a mistake including the XQD slot; we'll see how fast those cards can be made. Shortly after the D4 was announced, the Lexar 1000x cards came out that were faster than XQD cards that were current. My understanding is that now there are now XQD cards slightly faster than the Lexar cards, but at 1000x, but I never had any trouble with the CF memory cards keeping up with either camera. Also, if I'd taken along the XQD cares, I'd also have needed an XQD reader or have had to hook the camera body to the computer to download photos from the camera. Using a reader rather than the camera body allowed me to recharge the camera battery while the data was being saved.
I didn't need the extra batteries for the camera bodies since I found that a fully-charged battery, even being on and in use all day, used less than 40% of the charge. Of course since I never used the flash, the 12 AA batteries were unnecessary as was the recharger for the AA batteries.
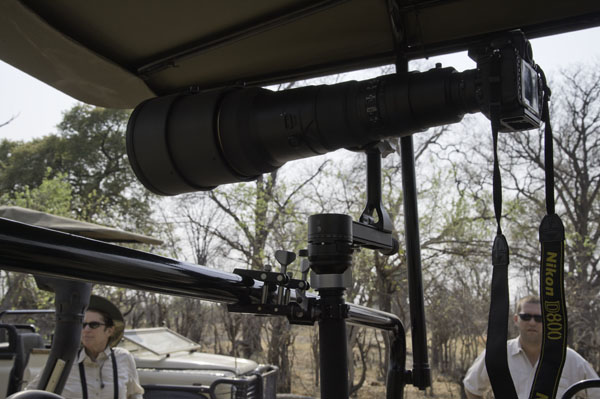
In our experience in Botswana, at least, all the vehicles are Range Rovers which provide a perfect mounting bar for the "Andy Biggs Safari Rig-Ultimate" from the company Really Right Stuff (RRS from now on). Above is a photo of the 600mm lens mounted on the Range Rover using the "Ultimate Safari Rig." I've heard that in other parts of Africa the safari vehicles tend to be different, and bean bags can be a better solution. If you're going on safari, be sure to research the vehicle type so that you can bring the best possible camera support.
I didn't bring a bean bag and it would have been simple: just bring the empty bag and fill it with beans or rice or something when you get there and you can discard the filling before going home to save some weight. But there were beanbags in most of the safari vehicles that I could borrow, and those were often very useful. In fact, if the big lens was not mounted on the RRS rig, I could place a beanbag on it and turn the rig to point in the appropriate direction.
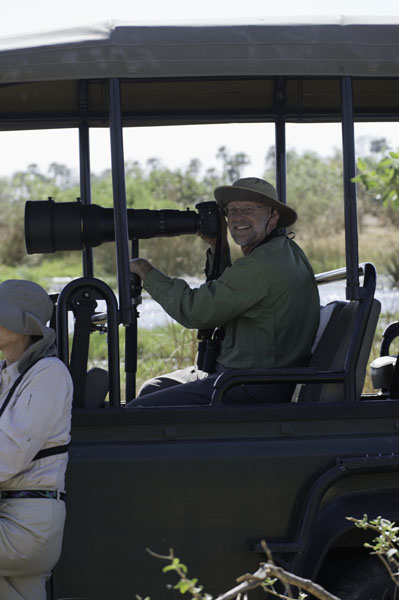 In this photo I am using the safari rig. Luckily, I can't be blamed for cutting Ellyn in half in the photo: it was shot by our guide. Be sure to wear a floppy hat as in the photo: if you wear a baseball-type hat, when the brim is forward, you can't use the viewfinder on the camera, and if you reverse the cap, your IQ goes down by 30 points and you won't remember how to use the camera.
I've always been really happy with all the RRS equipment. In fact, for the two telephoto lenses, I replaced the Nikon "feet" with RRS versions and I got the RRS mounting plates for both camera bodies in case I wanted to mount them in the vehicle. I wasn't sure I'd use the camera body plates, but they turned out to be useful since I could mount a camera with the small lens at 24mm and record a movie as the Range Rover plowed through the bush. I just used the short plates and not the "L" plates (which would allow for a vertical mount) since I can easily make a vertical mount using the gimbal system on the RRS safari rig.
It was impossible to fit all the camera gear even into my large bag. The main problem was the lens hood for the 600mm lens. But the two parts of the lens hood nest and can easily be placed sideways in another carry-on bag and since the inside is hollow and you can pack other stuff inside them, they take up almost no room.
I also had concerns about the weight of the equipment: the camera bag itself was over the 20 kg limit on the bush planes, but all the rest of our stuff weighed less than 20, so the total for the two of us was legal: just one bag weighed more than the other three put together. Nobody bothered us at all, but I made sure that whenever possible I was carrying the ultra-heavy pack and I tried not to let any airport employees handle it. If push had come to shove, I suppose I could have moved some stuff into my wife's carry-on to better balance the weight, but she much preferred that I be the one carrying all the weight.
To fly in the bush planes it's required that you have neither hard case luggage nor luggage with wheels. The camera backpacks and duffel bags worked fine, but we saw one guy at the Maun, Botswana airport having trouble because he'd brought a hard, oversize bag. The problem is that such a bag simply will not fit in the cargo space of the small planes.
Power for recharging the batteries, laptop, et cetera, was easy at our lodges. Every tent cabin provided power for US, European, South African and Botswanan plugs. With the setup we had, we could basically recharge everything at once.
To reduce the traveling weight, I put electronic copies of the user's manuals for both cameras on my laptop. In addition, I included a manual for Photoshop and Lightroom, but it turned out that the only manual I needed was for Adobe Bridge, which isn't part of the Photoshop or Lightroom manual.
Lessons Learned (in no particular order)
 I ordered the two new bodies each on the same date they were announced, but due to demand, I waited months for both of them so I only had a few weeks with them at home to practice. As a result, I did make a few mistakes and missed a few shots in the field. Luckily, the user interface on both was similar and also similar to the older Nikon digital cameras I'd used many times. But during the last couple of weeks before the trip while my wife was reading entertaining and useful books, I spent a lot of time reading the camera manuals.
When the cameras arrived, I dutifully attached the straps to the cameras, and I never used them. In fact, they sometimes got in the way. I kept thinking I should just take them off, but I was so busy in the evenings ("busy" sometimes meaning "sleeping") that I never got around to it. I could easily have done that at home and next time that's what I would do.
Set the time zone on all your cameras when you arrive. For some reason, mine were out of sync for a couple of days: one on African time and one on California time. OK, I'm an idiot!
If you care about your photos, be sure to have some backup mechanism. Some people take a laptop and an external disk drive so that the photos can be copied to both, and I just copied them to a laptop and brought enough memory cards that I never had to erase them. Of course in the field if I totally blew a shot or a series of shots, I'd delete those on the spot, but I hardly ever went back through the previous photos to delete obviously bad ones. I was afraid that I'd miss a photo opportunity while I was messing with the editing.
I never did figure out how to use the 600mm lens on the various boats we traveled on. There was no decent way to mount it, and as I look through all the photos from the trip, I didn't get any useful ones from the 600mm lens on a boat. I did get a lot of great photos with the smaller telephoto, with and without various extenders.
I also shot everything in RAW mode so that if I did make an exposure error that wasn't too bad I'd be able to do a pretty good job of correcting it later in Photoshop or a similar program. A totally paranoid approach, which would have vastly increased the memory requirements, would be to have both memory cards in the cameras and to record the image on both.
 Don't try to shoot with gloves on, even very thin gloves. Most mornings were warm, but one was very cold and in addition to a fleece jacket and a warm beenie, I put on some thin gloves. When the first photo opportunity arose, I found that I couldn't even feel where the shutter button was, so after missing the shot I took the gloves off. The next opportunity, I took a series of photos until the animal left and I discovered that apparently when I had been groping around with the gloved hands, I had hit the exposure compensation button instead of the shutter release causing the second series of photos to be underexposed by 1.7 stops, making them basically useless.
I think that with bodies as complex as the two I took, in the future it would be a good idea to have a checklist to make sure all the settings on both cameras are in a known state before heading out in the field. When I'm shooting, I can usually remember settings changes I make before individual shots and to restore them immediately afterwards, but the next morning, I often find the bodies is a somewhat strange state and I forget to reset everything. For example, when it gets darker as the sun goes down in order to get usable (but probably not great) photos, I slowly increase the ISO settings, especially on the D4, and forget the next morning to change the ISO down from sometimes ISO 5000 or even higher.
But there are other things I often change at the end of the day, or even during the evening when I change the mode or focus priority, or other things. If I had just had a checklist that I went through every morning I would have had a few better photos. The checklist probably should include a look at the settings on the complex lenses to make sure the VR is engaged, the autofocus is on, et cetera. One morning I wasn't getting sharp shots and I couldn't figure out what was wrong for a while until I noticed that when I scooted the big lens on the towels on the seat beside me, I managed to brush the VR to "off".
 My usual setup was to have the D800 with the 1.4x extender on it connected to the 600mm lens and the 70-200mm with the 2x extender mounted on the D4. With the bouncing vehicle, the long lens usually sat on a seat beside me, protected by a towel or poncho and I could easily get off a quick shot with the other. If the shutter speed was high enough, hand-held shots with the smaller setup were pretty good, but there were also beanbags available to brace the lens against things on the Range Rover. It took 20 or 30 seconds to mount the big lens/camera combination so I'd usually snap an "insurance" shot with the smaller setup before mounting the big bazooka.
The 70-200mm with the 2x extender was effectively a 140-400 f/5.6 lens, and that was a great range. It was also far easier to use the lighter setup for tracking flying birds or moving animals.
I usually left the extenders on the bodies in the field to reduce the amount of dust that got inside the camera and I was able to keep the image sensor on both bodies quite clean. Sometimes, with far-away subjects, I'd take some "insurance" shots with the 600/1.4x/D800 and then I'd swap the 1.4x/D800 with the 2x/D4 to give me an effective 1200mm f/8. The D4 is actually capable of doing a form of autofocus at f/8, as long as the focus point is exactly in the center. I stabilized things as much as I could with the RRS support, with the lens's vibration reduction and my arm draped over the top of the lens to try to hold things as steady as possible.
 It's a good idea to check all your equipment and make sure you have the appropriate wrench or screwdriver to tighten every connector that might come loose. The rides in the Range Rovers can be very rough, and it's easy for things to rattle their way loose. I did that and I'm glad I did, but in retrospect, I probably should have used Loctite on some of the connections on the RRS monopod setup. Or at least I should have brought along a little tube of Loctite.
Test your memory cards before you go. One of my 16 gb compact flash cards recorded bad files on approximately half the photos it tried to record. The reason I didn't test them is that eight of them arrived the day before we left for Botswana and I'd never had trouble with brand-new memory cards before.
What I don't like about the equipment
I wish there were stronger locks on the lenses that made it harder to change the AF and VR settings. I almost always had both on and there were only a few times that I had to override the AF when the subject was hard to pick out behind branches or something. I don't think I ever (intentionally) turned off the VR.
On both Nikon bodies, the button to "protect" the image is too close to the commonly-used buttons. I'd sometimes inadvertently lock a photo and then when I noticed that a series of photos was crap, I'd try to delete it, by repeatedly pressing the delete button until all the bad photos were erased. But it would get "stuck," repeatedly telling me I couldn't erase the photo. Since there's a message anyway, like, "Do you really want to delete it?" I didn't read the message which actually said, "I can't delete it."
I had no complaints at all about the RRS stuff.
Settings I usually used
These are the settings I used for animals in the field; for photos in the lodge, or of people, et cetera, the settings were sometimes quite different.
I took all my photos in RAW mode, lossless-compressed.
When I had two memory cards (in the D800: I didn't purchase any XQD cards) I had the photos go onto the CF card and videos go onto the SD card.
 I used "continuous-servo autofocus" so the camera was constantly trying to focus while the shutter release button was halfway down. Thus as I was watching an animal through the viewfinder, trying to keep the focus point on the eye as I waited for a good position, good light, and good composition, the camera was trying to keep the eye in focus.
I usually used "dynamic area AF" so that if the subject moved away from the primary focus point the camera would try to track it to nearby focus points. I tried various sets of points, and it was hard to tell which setting worked best. I'd seen some advice that the largest number was the best for erratically-moving subjects, so I usually used the 51-point version.
In a few cases, when the animal was behind branches and autofocus was having trouble, both of the big lenses let me override the AF with a manual focus.
I used the "continuous high-speed release mode" so the camera took up to 10 frames per second when the shutter-release button was down. This is great for flying birds, or if a big cat is yawning and you want to get the photo where the mouth is as wide-open as possible. The relatively huge buffers on the D4 and D800 made it so that I never came close to filling them during a burst.
I played around a lot with the ISO sensitivity: I tried to keep it low, and there's an "ISO-auto" setting where it tries to use the value you specify but if that's impractical, it'll adjust the ISO for you. At first I used that with a maximum of ISO 12800, but that was too high and with a high shutter speed priority, I got a bunch of bad photos. I reset the maximum ISO to 5000 and it worked better, but I went back and forth, using ISO-auto and fixed ISO. I'm not sure what the best answer is here.
Since I usually wanted the subject to be exposed correctly and I wasn't too worried about the background, I usually used center-weighted exposure metering. I used the default-sized area for the metering.
I used all the exposure modes except for manual, depending on what I was trying to do: shutter-priority if I was trying to catch flying birds, aperture priority if I was trying to blur the background or conversely, trying to get as much in focus as possible. The programmed mode was quite often good enough, especially since you can fine-tune the P (programmed) mode with the thumbwheel. I find that the only time I use the manual mode is with a flash, and I probably used the flash three times in Africa.
To my eye, some days a lot of the photos seemed to be coming out a tad overexposed, so on those days I just shot all day long with an exposure compensation of -0.3. Also, when I was shooting sunrises or sunsets, I'd often crank it to -1.7 or even -2.0 to make everything dark except the sun.
Since I was shooting RAW all the time, I wasn't too worried about the white balance, and left it on auto basically the whole time. I have no complaints about that strategy.
Since I had two cameras and they were both sort of new, the numbering threatened to overlap, possibly giving me multiple photos with the same name. I changed the default "_DSCxxxx" to "_TD4xxxx" and "_TD8xxxx" to distinguish the D4 from the D800 photos.
There's a setting under AF-C priority selection that tells the camera to take focus a little bit into consideration during the high-speed shooting rather than just blasting away, and I turned that on to "Focus+Release". I'd prefer sharper photos if possible.
I got really good at moving the central focus point with the thumb control to sit on the eye of the animal I was shooting. Originally, I figured it would be better to have that point be able to wrap around at the edge of the focus area, but I found that to be annoying since in my excitement, what I wanted was the point on a far edge and I often stepped beyond and had to step back before taking the photo. With no wrap around, if I wanted the focus point as far right as possible, I'd shift to the right until it didn't move and I knew I was there.
Since I often wanted to show my wife or the guide/driver the result, I increased the time that the image was displayed on the LCD screen to one minute. The 6-second default was way too little, and after I'd shown it, I'd just press the shutter half-way down to turn off the image. Using the LCD is what really uses the battery, but I found that the battery life was so long that it was never an issue. Also, with the 4-hour break between the morning and afternoon activities, I'd just recharge the batteries in the middle of the day.
When you are reviewing your photos, you can adjust how many different views of each photo are available: you can show the burned-out parts, the distribution of color intensities, all the settings, et cetera, and when I first set up the cameras I figured that I might as well have all of it available. But with the one-minute display of the image, I often found that I was simply changing the information about the previous image when I was trying to make an adjustment for the next photo I was trying to take. When nothing happened, I'd figure out to partially depress the shutter button and things would be fine except that the next time I wanted to review an image, it almost never came up the way I wanted: just a straight-forward view of what I got. So I reduced the number of reviewing options drastically and that worked well.
Since I never used the "Live View" for normal photography, I just always kept the live view switch set for "video." That way, as soon as I pressed the live view button, the camera would start recording high-speed video.
Equipment List
Nikon Lenses
AF-S Nikkor 600mm f/4.0G ED VR
AF-S Nikkor 70-200mm f/2.8G ED VR
AF-S Nikkor 24-120mm f/4.0G ED VR
Nikon TC-14E II 1.4x Teleconverter
Nikon TC-20E III 2.0x Teleconverter
Nikon Bodies
D4
D800
Nikon Flash
SB-910 AF Speedlight i-TTL
Memory Cards
2 32-gigabyte SD cards (slow)
2 32-gigabyte CF cards (Lexar 1000x)
8 16-gigabyte CF cards (Lexar 1000x)
Battery Support
Extra battery for D4
Extra battery for D800
12 AA rechargeable cells
D4 battery recharger
D800 battery recharger
AA battery recharger
Power converters for European, South African, Botswanan to US
1-to-3 power splitter US-to-US
Camera Support
From Really Right Stuff
Small body plates for both Bodies
"Ultimate Safari Rig"
Binoculars
Medium sized: 8x42 instead of my usual 10x50.
Laptop
Mac Air
High speed CF and SD card reader (USB-3)
Laptop charger
USB-3 cable
USB-2 cable (just in case)
Tools
Hex keys for all hex nuts
Leatherman "Wave" multitool
Visit my Home Page.
Want to send me mail? Click here: tomrdavis@earthlink.net.
 My wife and I spent two weeks in Botswana in September and October 2012, looking for and photographing animals (mostly birds). I was the photographer; she was the looker. Where possible, we paid a bit extra to have private vehicles so we could do exactly what we wanted in terms of spending time to get exactly the right photos, the right lighting, et cetera. We're also more interested in birds than the typical safari goer, and with a private vehicle we wouldn't annoy the other passengers when were chasing and trying to photograph even the "little brown birds."